Should I Insulate My Garage? This is one of the most popular questions homeowners often ask.
When done right, insulating your garage provides many benefits! Garage insulation reduces energy consumption and helps the HVAC system have a longer life.
But it’s not that simple.
While most insulation companies will tell you that you can benefit from insulating your garage, it’s not for everyone.
If your garage is detached from your house, insulating it is unnecessary.
However, most garages nowadays are also used as storage spaces for important machines and other belongings. Many folks these days are making the transition from garage to habitable space. So, with the proper garage insulation, you can make your garage comfy enough for doing DIY projects, having guests, or simply hanging out.
The insulation will keep the moisture out for areas with high humidity, protecting your machines and interior from water damage, mold buildup, and rust formation.
7 Reasons Why You Should Insulate Your Garage?
Insulation is a must if your garage is connected to your living space. In addition, storing important items in your garage would require proper insulation to prevent moisture damage.
Insulating your garage is more than just regulating the temperature inside your house. You can also get additional benefits:
1. Provides a Functional Space All Year-Round
You can always use your garage space with an insulated garage for other activities. It can be an office, fitness center, or even a place to hang out with friends. Regardless of the weather, your insulated garage will remain a cozy area.
2. Reduces Your Energy Consumption
The HVAC system uses more electricity if some parts of your house are not properly insulated, and insulation aids in cost-cutting by decreasing heat loss. You’ll notice much more change if partitions or walls separate your home and the garage.
3. Protects Your Interior Against Moisture
Insulation helps prevent moisture and rust from damaging the items in your garage. Furthermore, you can prevent the growth of molds. Therefore, you won’t have to worry about water accumulation and related problems damaging the paints and tools.
4. Reduces the Noise Coming Inside Your House
A good insulation system can help filter out noise. While it may not eliminate all the noise, it will help reduce the sound that comes into your garage or home. So, if you live in a busy location and have set up a workstation in your garage, you will not be disturbed by annoying, loud sounds.
5. Increases Your House’s Resale Value

A well-insulated garage is a great way to increase your home’s resale value. With good insulation, you will preserve your interior finishing, and prospective buyers will also see it as a sign that your home was built with quality in mind.
6. Prevents Insect Infestation
When insulating a garage, you also close any cracks or openings that may allow air to escape. So, if you install an insulation system, it will be harder for bugs to get into your garage or living space.
7. Separates the Garage from Your Living Space
Any carbon monoxide from your cars accumulating in your garage might make its way into your home. Insulating and air sealing your garage walls and ceiling will prevent this and save your family from any health risks.
Connect With A Garage Expert
Connect with local experts, Compare quotes, Get the best price.
Signs of Insulation Failure in Your Garage
Still doubt whether you need to re-insulate your garage? If you just moved into a new house, the garage might already need a new insulation system. Or maybe your garage insulation system just suffered from some damage. Here are some things you have to think about:
- The garage’s temperature is “transferred” into the adjoining rooms
Heat can easily be transferred in and out of the walls without the insulation barrier separating your garage and living space. During hot summer days, you may feel the wall between the garage and the adjoining room becomes hotter.
- Floors close to the garage tend to be chilly in the winter
The cold temperature can creep into your living space through your uninsulated garage. If you feel that your concrete floor or tiles are icy during the winter, it could be coming from the adjacent garage.
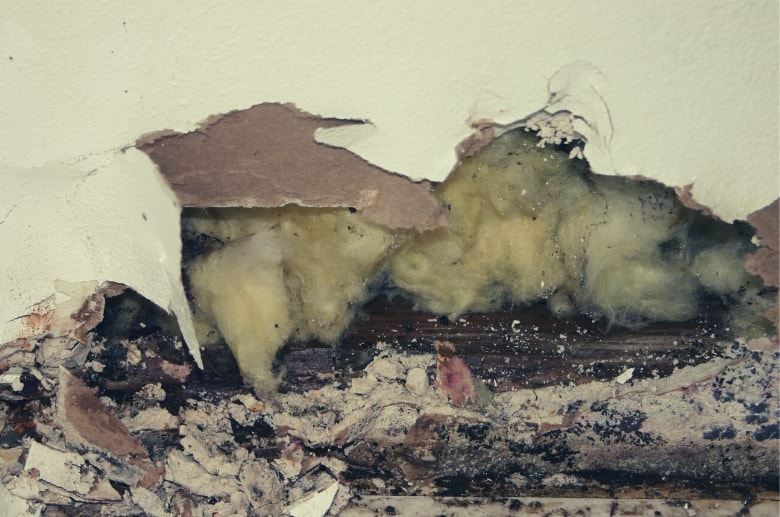
- Former insulation materials have begun to peel or crumble
Moving into an old house with an insulated garage could be an advantage until you discover that the insulation system is already deteriorating. So, if the insulation material is already peeling or crumbling, it’s time to call the experts.
- Everything that happens in the garage can be heard throughout the entire house
A layer of insulation can lessen the sound traveling from another room. If your insulation system is broken or getting worse, the sounds from your garage will get through the walls.
- There hasn’t been a renovation or repair done in at least ten years
Some insulation systems are prone to wear and tear. If your old garage hasn’t been renovated for the past ten years, it’s highly possible that the insulation system already needs replacement or repairs.
- The adjoining room’s temperature rises when the garage door opens in the summer
Without an air seal and insulation barriers on the garage walls, a gust of hot summer wind entering your garage door can easily travel into the adjoining room
- You can feel drafts through outlets and light switches
Insulation also includes making sure that the room is airtight. If you can still feel air coming out of the light switches, outlets, and other wall fixtures, it’s possible that the insulation system isn’t properly installed.
5 Types of Insulation: Which Is Best for Your Garage?
Installing insulation in a garage is almost always a smart move.
The same insulation used in the rest of the home can be installed in the garage. However, some types may be preferable. Therefore, you should carefully consider the different types of insulation systems, including their pros and cons.
NOTE: The R-Value is the capacity of an insulating material to resist heat flow. The higher the R-value, the greater the insulating effect.
| Type of Material | Pros | Cons | Costs |
| Rigid Foam | R-value: 4/inch Easy to install Noise reduction | Too airtight Could permit infestation | Average Total Cost: $550 to $12,000 Material: $0.60 to $2 / ft² Labor: $1.50 to $2.50 / ft² |
| Fiberglass | R-value: 3.14/inch DIY-Friendly Affordable | Can cause irritation Can become a fire hazard Permits moisture penetration | Average Total Cost: $300 to $600 Material: $0.88 to $1.64 / ft² Labor: $0.25 to $0.80 / ft² |
| Reflective Barrier | DIY-Friendly Affordable | Not for cold weather Lowest R-value: 1/inch | Average Total Cost: $710 to $2,840 Material: $0.35 to $0.75 / ft² Labor: $0.30 to $2.00 / ft² |
| Cellulose | R-value: 3.70/inch Fire-resistant Eco-friendly | Can become a fire hazard Permits moisture penetration | Average Total Cost: $976 to $2,226 Material: $0.60 to $2.30 / ft² Labor: $1.15 to $1.30 / ft² |
| Spray Foam | R-value: 6.50/inch Fills gaps and cracks Prevents infestation | Very expensive Can shrink over time | Average Total Cost: $1,367 to $4,005 Material: $0.50 to $2 / board foot Labor: $50 to $100 / hour |
1. Rigid Foam
Rigid foam insulation has an R-value of 4 per inch, above average. It doesn’t break apart even in extremely humid environments because of its moisture resistance. It is recommended for garage doors and thin walls. However, it does not work well with sturdy walls and flooring. It’s a good option for renovation projects that include layers of insulation.
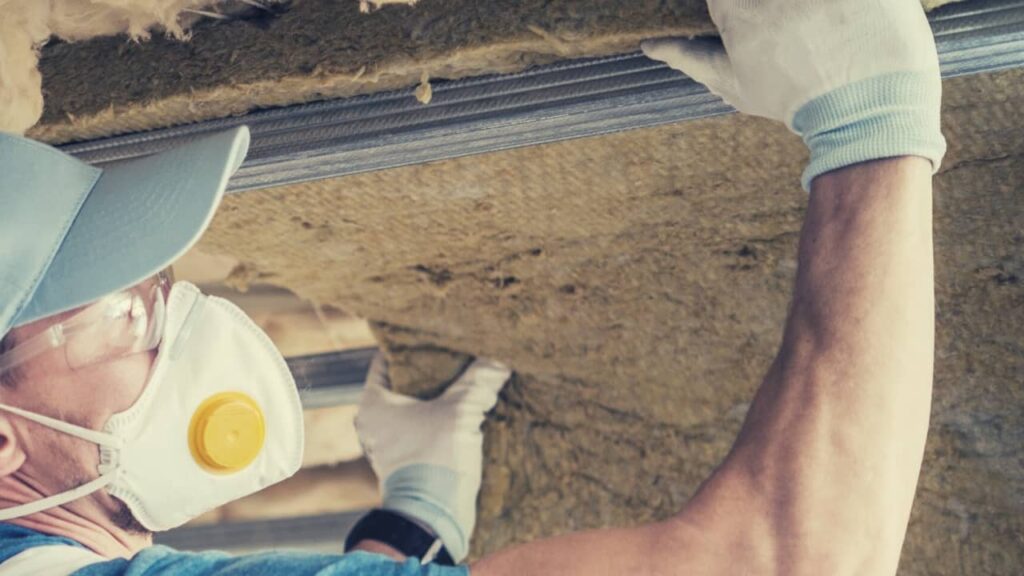
2. Fiberglass Insulation
Fiberglass insulation has an R-value of 3.14 per inch, the average value among the five materials on this list. This type of insulation material is a norm in residential garages. Since fiberglass insulation is the most budget-friendly and easiest to set up, it’s a great material for a do-it-yourself job.
You may either rent the necessary equipment to blast it in. You can also pour it in by hand, which will entail much labor. Garage wall insulation can be made from fiberglass that has been laminated with a plastic layer to prevent dust accumulation.
3. Reflective Insulation/ Radiant Barriers
Reflective insulation materials have the lowest R-value at 1 per inch, below average. With this type of insulation, the sun’s rays are reflected away from the building, which reduces the amount of heat that moves into the building. However, their efficiency is not quantified by an R-value. Reflective and radiant insulation may be created with kraft paper or polyethylene bubbles. Then, aluminum foil is used to reflect the sunlight.
4. Cellulose Insulation
Cellulose insulation has an R-value of 3.70 per inch, which is around the average value. The drywall must be installed on the wall or ceiling for this to work. The cellulose can then be blown into the space through holes punched in the drywall. It can be blown in from the outside by removing a row of siding or drilling into the concrete. Due to the complexity of the installation procedure, hiring a professional is a must.
5. Spray Foam
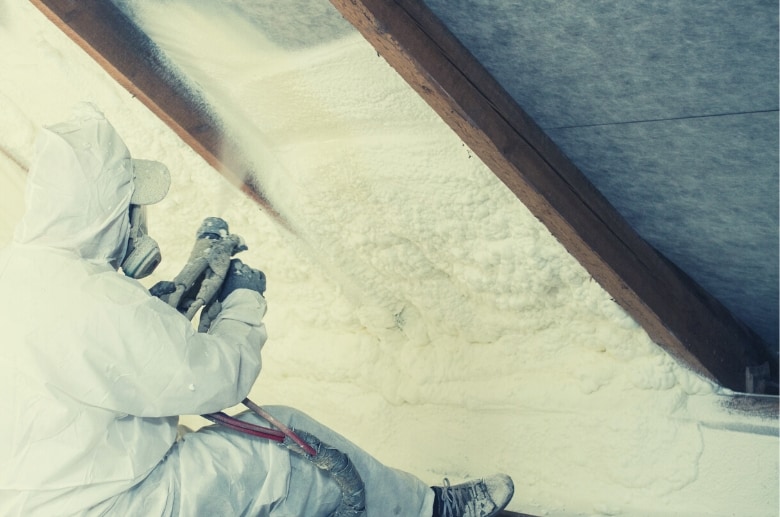
Spray foam insulation has the highest R-value at around 6.50 per inch. It is also effective in sealing air leaks. Spray foam is a high-end, more costly, and more energy-efficient insulating material. It’s a good option if you want to turn your garage into a living area.
Connect With A Garage Expert
Connect with local experts, Compare quotes, Get the best price.
Can I Insulate my Garage Myself?
Insulating your garage by yourself is possible if you have the necessary knowledge, skills, tools, and equipment. Fiberglass insulation is recommended since it is more versatile and easy to install. It can be used on a garage’s ceiling, walls, and flooring.
PRO TIP: Hiring a professional is recommended if you want to use something other than fiberglass for insulation. Using other materials might be more complicated, which could result in insulation failures if you install them yourself.
Reminders Before Doing a DIY Garage Insulation
Insulating your garage is tedious, requiring many tools, equipment, and moving things around. Therefore, there are many things you have to remember to prevent damage, installation errors, and back jobs.
So, here are some tips you should consider:
- Prepare the area before the installation process. Ensure that the concrete floor is dry and electrical boxes are not hidden. Fix any cracks, holes, or gaps in the outer wall before applying insulation.
- Ladders and scaffoldings will ensure your safety and the efficiency of your work.
- Apply vapor barriers on the insulation’s outside surfaces to prevent accumulation. If you’re insulating the ceiling with fiberglass, leave a 1 1/2-inch gap as an air barrier between the insulation and the bottom of the wood roof sheathing.
- Keep your insulation three to five inches away from electrical fixtures to prevent fire hazards.
- Remove all hanging objects from your wall that could damage your insulation system.
Tools and Materials Needed for Insulating the Garage

Tools Needed
- Ladders
- Scaffolding
- Utility screws
- Measuring tape
- Utility knife
- Drill driver
- Hammer
- Screwdriver set
- Face mask
- Eye goggles
- Gloves
- Staple gun
Materials Needed
- Construction tape
- Retainer pins
- Expanding foam to fill in the spaces
- Sealant gun
- Vapor barrier
- Plywood or drywall
- Edging strips
- Drywall screws
- Weatherstripping
Steps in Insulating the Garage Ceiling
- STEP 1: Get your scaffolding or ladders ready. Get someone to assist you if you must use a ladder.
- STEP 2: Take accurate dimensions of the garage’s overhead space. The area is calculated by multiplying the length by the width. After that, calculate the depth of the joints and the space between them. In most cases, their depth is between 8 and 10 inches.
- STEP 3: Make sure you use your carefully collected measurements to guide you while cutting the insulation.
- STEP 4: Put in the ceiling insulation and fasten it with a staple gun.
- STEP 5: Assuming any remaining corners, modify the insulation to fit snugly into them or use expanding foam. Lastly, install drywall or plywood over the roof.
Steps in Insulating the Garage Walls
- STEP 1: Get rid of the wall hooks and screws using a screwdriver and a hammer.
- STEP 2: Walls should be inspected for any holes or cracks. Moisture accumulation in these places can cause mold buildup. Put some sealer on the cracks and crevices. Before adding insulation, make sure the sealant has thoroughly dried.
- STEP 3: Fiberglass insulation should be used to begin insulating the space. Properly cut the materials to fit the spaces. Don’t try to force the insulation into the spaces between the wall studs.
- STEP 4: Apply a vapor barrier over the insulation and staple it down once you’re done.
Steps in Insulating the Garage Floors
- STEP 1: Install a polyethylene moisture barrier on the floor. Spread the vapor barrier out, then cover it with rigid foam insulation. Use rigid foam panels with the correct compression rating. Cut the tiles with a sharp knife to the appropriate size for the floor.
- STEP 2: Cover the insulation with a layer of plywood. Make sure that the seams of the plywood don’t line up with the seams of the foam. To achieve this, run the plywood perpendicular to the long dimension of the foam. Leave a quarter-inch gap between each panel, and maintain a half-inch space around the edges to accommodate the yearly expansion and contraction of the plywood.
- STEP 3: Put another sheet of plywood on top of the first. Use utility screws to join the two sheets of plywood together.
- STEP 4: Using edging strips, you must level the area where the garage’s raised floor meets the driveway.
- STEP 5: The floor can then be sealed with tiles or carpets. Plywood can also be coated with paint or epoxy for added protection.
Steps in Insulating the Garage Doors
- STEP 1: Carefully measure the height and weight of each panel. Use the tape measures as a guide to cut the insulation to size. Locate the midpoint between the horizontal rails and 12 inches from the panel’s edge.
- STEP 2: Insert the retainer pin into the panel and push it into place. Two retainer pins should be inserted into each panel. The insulation is then pressed against the panel’s holding pin.
- STEP 3: Attach the weather stripping to the insulation. It’s time to replace the crimped bottom seal with brand-new vinyl.
- STEP 4: Ensure your door is working correctly by testing it. If you pick it up and set it down, it shouldn’t move.
- STEP 5: Contact a specialist for a readjustment if the door slips or falls off.
Is It Worth It to Buy an Insulated Garage Door?
Garage door insulation is one of the most complicated parts of the process.
Buying an insulated garage door is much easier if you’re doing a DIY project for your new garage. Eliminating this problem right away is a good idea. Furthermore, a pre-insulated garage door is an excellent long-term investment if you plan to sell your home in the next ten years.
On the other hand, most contractors already include garage door insulation in their services. Therefore, you won’t need a pre-insulated garage door if you’re going to hire a garage insulation company.
How Much Does a Pre-Insulated Garage Door Cost?
The answer depends on several variables, such as insulation type, insulation’s R-value, door material, door design, and local labor expenses.
Note that these factors can all vary from the national average.
Now, on average, the price of an insulated garage door ranges from $700 to $6,000
On average, an insulated door for a one-car garage costs between $500 and $2,500, while a two-car garage costs between $750 and $4,000. As for labor costs, installation fees range from $300 to $500.
Depending on the material of the insulated garage door, you can expect to pay in these ranges:
| Garage Door Material | Material Cost: 8-foot x 7-foot | Material Cost: 16-foot x 7-foot |
| Steel | $450 to $1,500 | $700 to $3,500 |
| Vinyl | $700 to $1,500 | $950 to $2,500 |
| Composite | $750 to $1,600 | $900 to $5,000 |
| Fiberglass | $800 to $2,000 | $1,300 to $3,000 |
| Wood | $1,000 to $3,500 | $2,000 to $6,000 |
Final Thoughts
Insulating your garage is a money-saver. It can reduce electricity costs and extend the life of your HVAC system—all while preserving the interior of your garage.
Now, if you’re ready to insulate your garage, we’re just one call away. We’re affiliated with hundreds of professional insulation contractors that can help you. We can also provide a quote so that you can plan your expenses or adjust some things.