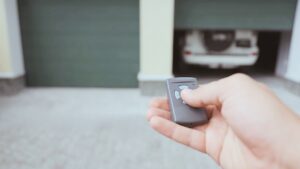
Did you try to shut your garage door only to find it opening right back up? Is the garage door wall panel light flashing when you try to close your garage door? Does your garage door shut even when there’s an obstacle in the way?
These are all signs that your sensor on garage door not working. Since garage door sensors are crucial in ensuring safety, you should fix them immediately to avoid any potential accidents. But before we discuss the various reasons why the sensor on your garage door is not working, it’s essential to understand how these sensors work.
How Do Garage Door Sensors Work
Garage door sensors, also known as photo eye sensors or safety eyes, are mandatory for all garage doors according to the UL325 regulations. These sensors prevent accidents by ensuring that nothing is blocking the garage door while closing.
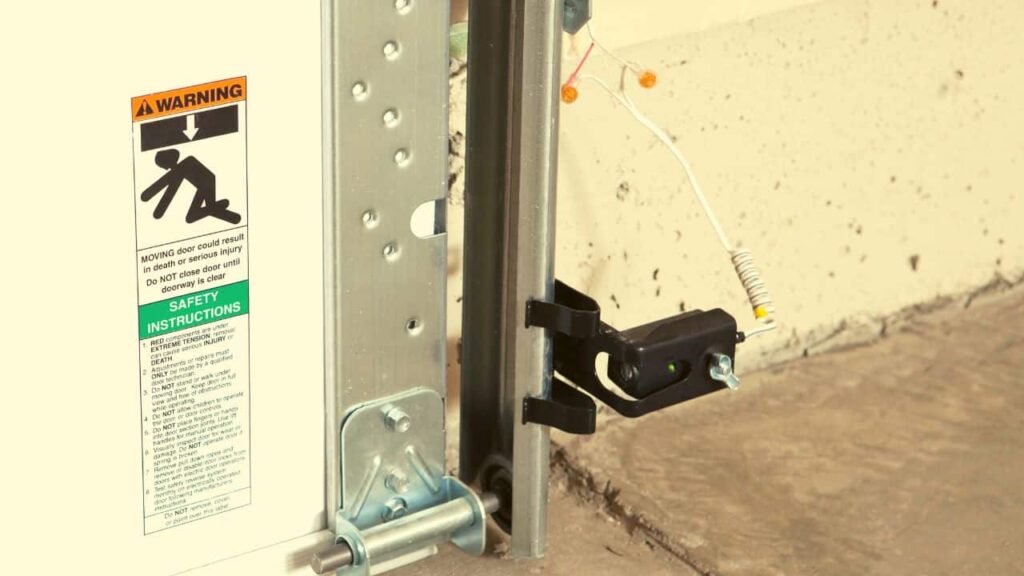
To understand how garage doors work, you should know that a garage door has two photo eye sensors placed a few inches above the floor on both sides, facing each other. One of the sensors (the sending unit) creates an infrared beam and sends it to the other sensor (the receiving unit).
When nothing is blocking the garage door, the beam is uninterrupted; and you can close the garage door. However, if something (your pet, car, or any other object) is blocking the garage door, it’ll interrupt the infrared beam; and the garage door won’t close.
Despite their utility and importance, most homeowners remain heedless of these sensors until they malfunction. Malfunctioned garage door sensors can often prevent your garage door from closing and threaten your safety and that of your loved ones. As a homeowner, you should know how these safety sensors work, why they malfunction, and how to fix them.
Connect With A Garage Expert
Connect with local experts, Compare quotes, Get the best price.
How to Troubleshoot Your Garage Door Sensor and Restore Functionality
Garage door sensors can malfunction due to various reasons, including (but not limited to) obstructions, misalignment of sensors, and damaged wiring. Diagnosing the issue and troubleshooting accordingly is important when dealing with malfunctioning sensors.
Follow the steps below to diagnose and troubleshoot your garage door sensors:
Step1: Look for Obstruction or Blockage from Dirt and Debris
If your garage door is not closing, you first need to check whether the LED lights on the sensors are on or off.
One of the sensors (the sender) will have an amber-colored LED to indicate that it is sending the signal. The receiving sensor should have a green colored LED indicating that it is receiving the signal from the sender. If the green LED of the receiving sensor is off, that means that it is not receiving the infrared signal.
Photo eye sensors are placed just a few inches above the ground, so it’s common for dust, debris, or other small objects to block them. A thorough cleaning of your garage door area might resolve the issue.
But if that doesn’t resolve the issue, it could be possible that the metal brackets along your garage door might be blocking signals. The signals these sensors send are electromagnetic, and anything metallic (in this case, the metal brackets) will absorb the infrared signals. If the brackets are coming in the way, adjust the sensors slightly higher than the brackets.
Step 2: Check for Accumulation of Dust on the Sensors
If you’ve swept and cleared the garage door area, but the green LED of the receiving sensor still doesn’t turn on, you should check to see if the sensors are dirty.
Photo eye sensors are small, black-colored boxes that often get covered with dust or humidity, preventing the infrared beam from reaching the receiving sensor. That’s true, especially if your garage door remains open.
To resolve the issue, use a (microfiber) cloth to clean the lenses from dust, droplets, or spiderwebs. Make a habit of regularly cleaning the sensor lenses to prevent dust and humidity from blocking the sensors.
Step 3: Make Sure that Safety Eyes are Placed Correctly

If the green LED doesn’t turn on even after you’ve cleaned the garage door area and the lenses, the problem might be the poor placement of the photo eye sensors. For the receiving sensor to receive the signal from the sender sensor, they must be aligned to face each other. If the green LED light of the receiving sensor is either off, dim, or flickering, the sensors are misaligned.
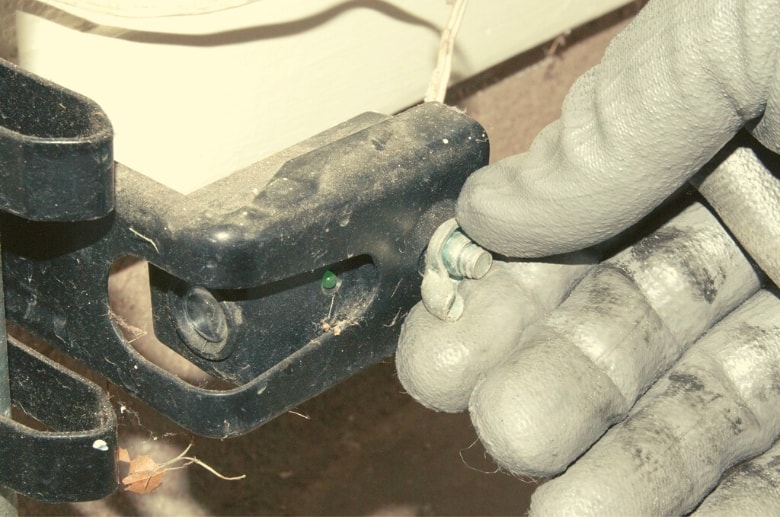
The metal brackets that hold the sensors in place can expand (in heat) or contract (in cold) due to the changing weather, which can misalign the photo eye sensors. To properly align the receiving sensor:
- Loosen the wing nut on the bracket of the receiver.
- Adjust the sensor until the green LED starts to glow steadily (indicating that the sensors are now properly aligned).
- Tighten the wing nut in that position.
- Now check your garage door to see if it works properly.
Step 4: Check if the Sunlight Hits the Sensors Directly
Does your garage door usually work properly but not at certain times of the day? You might not believe it, but direct sunlight might be the culprit.
Sunlight can come in the way of the infrared signal, preventing it from reaching the receiving sensor. You can easily resolve this issue by shading the garage door sensors using cardboard to save them from direct sunlight.
Step 5: Investigate for Loose/Damaged Wires or Connections
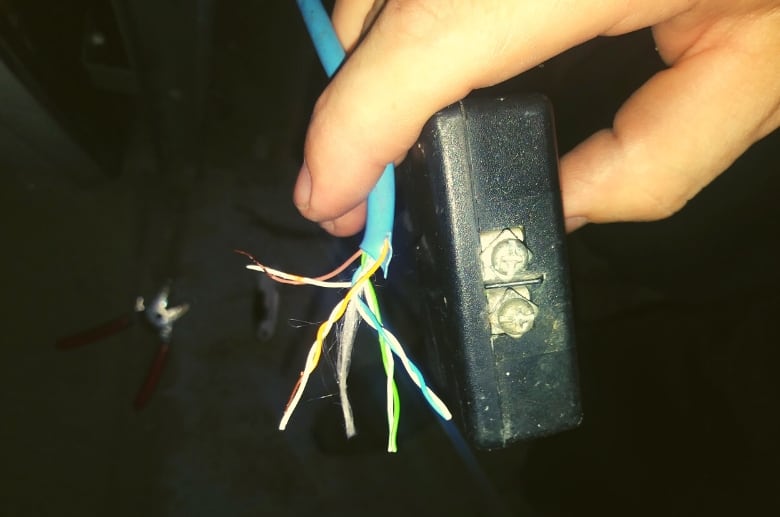
If none of the above steps fixes the issue, it’s time to investigate the wiring. Garage door sensors have wires at the back that connect with another set of wires that run along the wall and the ceiling and connect the sensors to the garage door opener.
Often these can become loose, or their ends pull out due to a sudden tug, Wear and tear, pests, or environmental damage, causing the garage door sensors to malfunction.
To fix wiring issues:
- Check to see if the wire ends have slipped out.
- If so, twist the wires together to secure them into the wire nut, and you should get a stable connection that will resolve your problem.
- Now go up to the garage door opener and check to see if the connections are secure there as well.
- If the wire ends are secured, and you still face issues, the wiring may be damaged.
- To resolve this issue, first cut off the power to prevent electrocution.
- Now, wiggle different wiring parts at the back of your sender sensor and manipulate the area where it connects with the wall wiring.
- If the LED light turns on while you’re wiggling the wires, it confirms that either the wires are too tangled up or there’s damage along the wire.
- If the wires are too tangled up, untangle them and turn on the power supply, and you’ll have a stable connection.
- But if you suspect the wiring is damaged, it’s best to call a professional to fix or replace it.
Note: Fixing or replacing the wiring yourself can result in wrong wiring connections, leading to short circuits that can damage the electrical equipment. It could also result in electrocution, so you should seek professional assistance.
Step 6. Check if the Eyelet or Transmitter is Damaged
Sometimes it’s not the wiring that’s damaged but the safety sensors. But how do you know? If your garage door safety sensors have been operational for over a decade or you suspect damage, you can verify it by following the steps below:
- Remove the wires coming from the back of your sensors from the wire set that connects them to the garage door opener.
- Detach the sensors from their respective brackets.
- Climb up the ladder to reach your garage door opener and unplug it.
- Remove the wires from quick connections.
- Connect the wires from the safety sensors directly to the garage door opener. Remember, the white wire goes into the white connection, while the white wire with a black stripe goes into the gray connection.
- After connecting the safety sensors directly to the garage door opener, plug it back in.
If the amber and green LED lights of the sender and receiving sensors turn on, that means your sensors are fine, and the problem lies in the wires. But if the LED lights are still not turning on, that means the safety sensors are damaged, and you’ll need to replace them.
Garage Door Sensor Replacement Cost
If your garage door sensors are damaged, you’ll need to replace them to ensure the safety of your loved ones and prevent accidents. When it comes to replacing garage door safety sensors, there are two main costs involved:
- Cost of garage door sensors
- Cost of installation
The average cost of a garage door photo eye sensor is between $70 to $100. But the actual cost depends on its brand, model, and features. As for its installation, the average range is $150 to $300.
Again, several factors come into play when deciding the actual cost of the installation. The hourly labor rates in your region significantly impact the installation cost. But other things, such as faulty wiring or malfunctioned motor assembly, can also increase the installation cost.
Connect With A Garage Expert
Connect with local experts, Compare quotes, Get the best price.
When Is It Time to Call a Professional?
If you’ve gone through all of the troubleshooting steps and your garage door is still not functioning properly, or if the sensors are faulty and need to be replaced, you should call a professional garage door repair service to diagnose and fix the problem.
To save up on the repair and installation cost, some homeowners consider a DIY repair and installation. Even though you can repair and install garage door sensors, things can take time and effort.
In such cases, most homeowners are left scratching their heads with a maze of wires in front of them. Sometimes a wrong connection can break down electric circuits or other important electrical equipment. Then there’s also the risk of getting injured.
Call a professional garage door repair service to install your garage door sensors to avoid such scenarios. Not only do you save up on time and hassle, but you also avoid the risk of electrocution.
The Takeaway
Having garage door sensors is an essential safety feature for all residential and commercial garage doors, protecting people and property from accidents. If you experience issues such as the door closing even when there’s an obstruction or the door reversing when closing, you may have issues with your garage door sensors.
Fortunately, some problems are easy to fix by cleaning the sensors or ensuring proper alignment. However, more challenging issues, such as damaged wiring or broken sensors, require professional assistance.
Whatever the problem, always ensure your photo sensors work to avoid injury and unwanted accidents. Don’t shy away from seeking professional help if things get a bit complex.