Connect With A Garage Expert
Connect with local experts, Compare quotes, Get the best price.
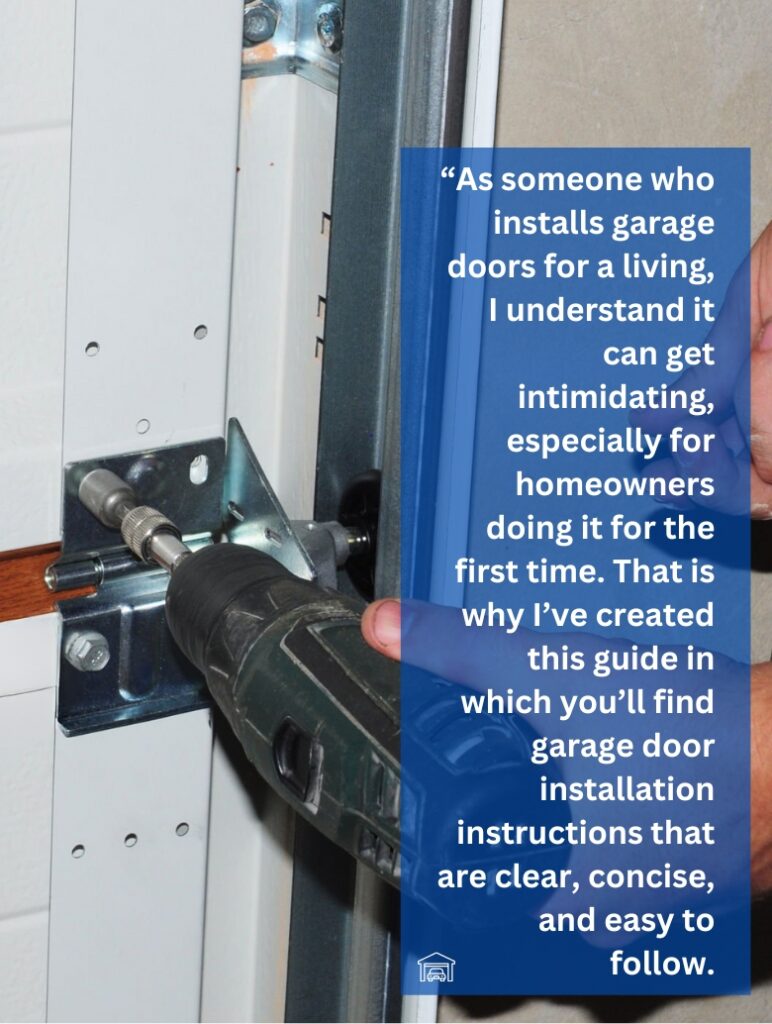
As someone who installs garage doors for a living, I understand it can get intimidating, especially for homeowners doing it for the first time. That is why I’ve created this guide in which you’ll find garage door installation instructions that are clear, concise, and easy to follow.
Apart from being a valuable resource for beginners, there are also professional advice and many practical tips that will help more seasoned homeowners.
So, let’s get right into it.
How to Install a New Garage Door
Before we get to the actual process, there are two things that we need to do:
Tools and Materials
Here’s what you’ll need:
- Tape Measure and Level: For accurate measurements and ensuring everything is aligned correctly.
- Adjustable Wrench & Socket Set: Essential for working with bolts and nuts.
- Cordless Drill: A time-saver for drilling holes and driving screws.
- Hammer: And other essential tools for various tasks during installation.
- Safety Glasses & Gloves: Protect your eyes and hands from potential hazards.
- Ladder: To reach the upper parts of the garage door area.
- Impact Driver: To mount hinges.
- Locking Pliers (Vice Grips): To keep the door open.
- Ratchet Wrench: To tighten lag screws.
- Garage Door Winding Bar: To adjust and replace torsion springs.
Measure the Garage Door
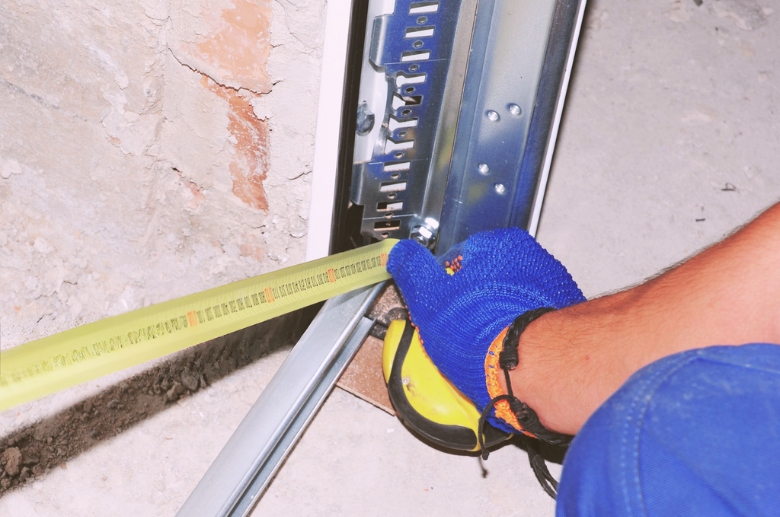
Measuring a garage door involves three key dimensions: width, height, and depth:
- Extend your tape measure across the garage door opening from one inside edge to the other to measure the width.
- For height, measure from the floor directly up to the top of the door opening.
- The depth is gauged by measuring from the front of the garage door opening to the farthest point inside the garage, ensuring enough space for the door’s operation.
- Take multiple readings to improve precision.
Once you have these readings, you can order the right-sized garage door. In cases where standard garage door sizes don’t align with your measurements, custom options are available.
Safety Considerations
Once you’ve gathered all the tools you’ll need and have the new door in front of you, you can begin the process. But before that, you should consider the following to avoid any damage or injury:
Always disconnect the power to your garage before starting any work to prevent accidental electrocution:
- Locate your home’s main electrical panel and find the breaker labeled explicitly for the garage.
- Flip this breaker to the “off” position to cut off the electrical supply, making it safe to proceed with your garage-related tasks.
- Always double-check to ensure the power is off before starting your work.
If you’re removing an old door, handle springs and cables with extreme caution. They are under high tension and can cause injury if mishandled.
- Always use proper tools and safety gear.
- Close the door to relieve tension on the overhead springs. This allows you to handle the springs safely.
- If your door has side extension springs, ensure they’re secured with C-clamps.
It’s also wise to have a helper for some parts of the installation, like aligning and securing heavy panels or managing the tension of springs and cables. Handling these procedures alone is challenging and often requires more than two hands.
Remember, garage door installation requires precision and patience. Take your time to ensure everything is level, aligned, and securely fastened.
Step-by-Step Garage Door Installation Instructions
Here’s the step-by-step guide that you can follow to install your garage door:
Step 1: Removing the Old Garage Door
- Disconnect and remove any existing opener.
- Secure the door in place using vice grips. Here’s how:
To properly use a vice grip for securing a door, start by squeezing the lever located on the lower handle; this action loosens the grip. Then, adjust the bolt found on the upper handle to either loosen or tighten it, which in turn will open or close the mouth of the vice grip according to the specific requirements of your task. Once the vice grip is adjusted to the desired width, clamp it onto the door to hold it firmly in place. To finalize the process and ensure the door is securely held, squeeze the lower handle of the vice grip, which locks the pliers in place, providing a stable and secure hold.
- Once the door is secured, carefully unwind the springs using winding bars. The extreme spring tension makes this procedure dangerous, so it’s best to have professional garage door technicians perform it.
- Remove the door panels. Start from the top and unbolt the hinges, brackets, and tracks.
- Set these components aside for disposal or recycling.
Step 2: Installing the New Garage Door Tracks and Hardware

- Lay out all the parts of your new garage door.
- Install the vertical tracks using brackets attached to the door frame.
- Make sure they are level and plumb.
- Assemble the door sections by attaching each with rollers and hinges
- Lift and set the bottom section in the doorway, followed by the remaining sections.
Step 3: Attaching the Rollers
- Insert rollers into the brackets on each door section by placing each roller into the corresponding bracket on the door. Make sure they fit securely. (This step is part of assembling the door sections and preparing them for movement along the track.)
- Check that they roll smoothly in the tracks as you add each panel to ensure the door is properly aligned.
Step 4: Assembling and Installing the Spring System
There are two main types of spring systems, depending on the type of garage door you get. Installation of these spring systems is different from each other, and we’ll talk about them separately:
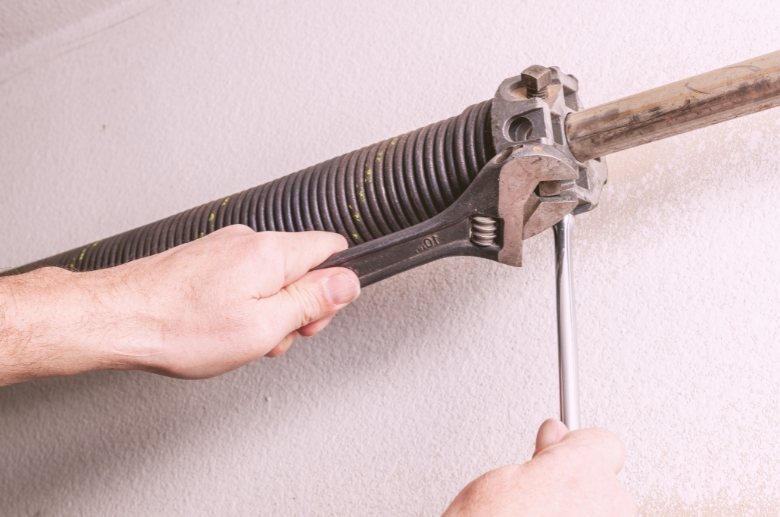
Torsion Spring System:
- Mount the spring assembly above the door, securing the spring anchor bracket and torsion tube.
- Slide the springs onto the tube.
- Add cable drums by attaching the cable drums at each end of the torsion spring shaft. Ensure they’re appropriately seated and secure them in place.
- Wind the springs with winding bars, ensuring equal tension on both sides. To do this, insert a winding bar into the winding cone, turn it to apply tension, and repeat the process with the same number of turns on the other spring to ensure balance.
Extension Spring System:
- Install the springs on either side of the door.
- Connect one end to the track support and the other to the pulley system.
- Correctly set up the pulley and cable system, ensuring the springs are evenly tensioned:
Begin by attaching the cables to the bottom brackets on either side of the door. Once attached, route these cables through the pulleys connected to the springs at the top. Then, it’s crucial to secure the cables in place, paying special attention to ensure that the springs are tensioned evenly.
This step is essential for the balanced operation of the door. It guarantees that the door will open and close smoothly and efficiently without any unnecessary strain on one side.
Step 5: Installing Horizontal and Rear Tracks
Connect the horizontal tracks (which extend from the doorway into the garage) to the vertical tracks on each side of the door. Ensure both tracks are level and aligned for smooth operation. Then, install and secure rear track hangers to the garage frame, attaching them to the horizontal tracks for stability.
Step 6: Attaching the Springs and Cables
Attach the cables to the bottom brackets on each door section for torsion springs. For extension springs, thread the cables through the pulleys (i.e., run the lifting cables through the pulley system, which is part of the extension spring mechanism on each side of the door) and attach them to the springs. Adjust the tension carefully to ensure balanced movement.
Step 7: Testing and Adjusting Garage Door Operation
Before reconnecting the opener, test the door manually by opening and closing it. It should move smoothly with minimal effort. If the door doesn’t move or requires significant force, the springs have an imbalance or excessive tension. In such cases, adjust the spring tension for balance.
Step 8: Finishing Touches
Install weather stripping along the bottom and sides of the door to seal the gaps and for insulation:
- Clean the garage door.
- Cut the weather stripping according to the width of the door opening.
- Peel off the backing of the weather stripping.
- Position it by aligning its top edge with the bottom edge of the garage door.
- Press firmly to create the proper fit.
- Make sure all sides are covered and the stripping fits snugly.
Add any additional accessories like handles or locks as required.
Throughout the installation, ensure constant alignment and operation checks. If you encounter any uncertainties, especially with spring systems, seek help from a professional garage repair service to ensure safety and correct installation. Your effort will improve your home’s aesthetics, security, and efficiency.
Estimated Costs for Garage Door Installation
DIY installation can range from $600 to $1,500 for a standard single garage door, mainly covering the door’s cost and necessary tools. On the other hand, professional installation costs between $800 to $2,500, which includes the door, labor, and additional materials.
Due to their size and complexity, double garage doors can cost more. DIY installation costs $800 to $2,000, while professional installations can cost $1,200 to $4,000.
The actual cost of installing a garage door can vary depending on the door type, material, size, and whether you’re considering a DIY approach or hiring professionals.
The material of the door plays a significant role in pricing. Steel doors are cost-effective, ranging from $400 to $1,700 for the door alone. Wooden doors, known for their aesthetic appeal, are pricier, with costs ranging from $1,000 to $4,000. Adding insulation or opting for high-end custom designs can further increase these prices.
Labor costs also vary by region and the complexity of the installation. On average, labor charges for garage door installation are between $200 and $500. Additional features like windows, advanced garage door openers, or specific architectural styles can add to the cost.
Note: While DIY installation can save on labor costs, the value of professional installation for safety, warranty, and precision should not be underestimated.
Here’s a quick reference table for average costs:
| Door Type | DIY Installation Cost | Professional Installation Cost |
| Single Garage Door | $600 – $1,500 | $800 – $2,500 |
| Double Garage Door | $800 – $2,000 | $1,200 – $4,000 |
| Steel Door | $400 – $1,700 (Door Only) | Based on the installation choice |
| Wooden Door | $1,000 – $4,000 (Door Only) | Based on the installation choice |
Note: This table should serve as a general guideline, and it’s advisable to get specific quotes based on your exact requirements and location.
When Should You Call a Professional?
While taking on the task yourself can be cost-effective, the expertise and precision professionals bring to the table are unmatched. They ensure a successful installation backed by experience and the right tools. The peace of mind that comes with professional installation, knowing that every component is correctly and safely installed, is invaluable.
If your garage door system involves intricate parts like torsion springs or advanced electronic components, it’s time to call an expert. These elements require specific tools and know-how for safe installation.
Moreover, suppose you need clarification on any step of the installation process. In that case, seeking professional help rather than risking improper installation is safer because it can lead to safety hazards or further expenses.
While DIY garage door installation can be rewarding and cost-effective, the complexities and risks involved often make professional installation a more prudent choice. Selecting the right professional ensures a smooth, safe, and efficient installation, adding value and functionality to your home.
Remember, in home improvements, the expertise and finesse of a seasoned professional are often worth the investment.
Connect With A Garage Expert
Connect with local experts, Compare quotes, Get the best price.
How to Choose a Garage Installation Service
If you want to hire a professional garage door service to install your garage door, consider the following to make the right choice:
- Look for a professional that provides a comprehensive service package, including installation, maintenance, and repair.
- Customer support is also crucial; look for providers who offer robust after-installation support and are readily available to address any concerns or issues.
- Seek quotes from multiple providers to get an idea of the standard rates in your area. However, don’t just opt for the cheapest option; balance cost with the quality of service provided.
- Before settling on a service provider, check their track record and reviews and ask for references to gauge their expertise and reliability.
- Ensure the garage door professional you choose is properly licensed and insured. This adds a layer of trust and protects you from liability in the event of accidents or damage during the installation process.
- Consider the warranty and guarantees offered by the installer. A professional who stands behind their work with solid warranties reflects confidence in their skills and protects you against future issues.
Final Thoughts
When following garage door installation instructions, measure accurately, choose the suitable materials, and follow each step methodically. But above all, ensure you follow safety protocols to avoid any damage or injury.
Always consider the long term when deciding whether to go for a DIY approach or seek professional assistance. While a DIY installation might seem cost-effective in the short term, it’s always a good idea to consult garage door professionals to ensure proper installation and avoid injuries or door problems.
FAQs
Do you still have doubts or unanswered questions? Don’t worry; below, we answer some of the most frequently asked questions about garage door installation that you will find helpful:
How long does it take a professional to install a garage door?
Professional garage door installation typically takes less than a day. New construction may only require 2 to 3 hours, as there’s no existing door to remove. Replacing a door of a similar type and size should take about 4 to 6 hours.
Due to their size and weight, oversized doors require more time. Factors like weather conditions and the installer’s skills and experience can also influence the duration.
What is the toughest part of installing a garage door?
Handling the springs is one of the most challenging aspects of garage door installation. Garage door springs, particularly for heavier doors, are complex and difficult to manage, especially without the right tools.
Due to the safety risks involved, it is best to have at least two people assist with the installation. The complexity of dealing with springs is a significant reason why many choose professional installation over a DIY approach.
How do you prepare a garage door for installation?
Preparing for a new garage door installation involves several steps:
- Relocate Vehicles: Move cars away from the garage to provide room for the installers to work.
- Clean Up Garage Floors: Clear the area around the current garage door of any boxes, tools, or belongings.
- Remember Your Selections: Have any order confirmation documents ready to verify materials with installers.
- Keep Children and Pets Away: Ensure safety by keeping young ones and pets inside during the installation.
- Plan to Stay Home: Be home (or at least readily available via phone) for any questions during the installation.
- Prepare Questions for Installers: List queries about operation, maintenance, and warranty information.